Believe it; my email box is a sea of PR pitches. Some are incredibly relevant to consumer technology, while others are way off base, not to mention gross. And then some aren’t way off base but are also not totally relevant to technology. When Make Neon Sign dropped me an email asking if I would review their neon signs, I had to check it out.
I browsed the Make Neon Sign website, watched several videos, and read several reviews. Needless to say, I was more deeply intrigued, so I replied. The company offered to make the Techaeris logo into one of its LED neon signs and sent me a mockup. In exchange for this review, they had the sign made up, and a week or so later, it showed up. This is my review of Make Neon Sign.
UPDATE: Make Neon Sign reached out to us after seeing our review and informed us that the power touch-control module also doubles as a dimming switch. After investigating, we found that, indeed, it does dim the sign. Holding the power button down will dim or brighten the sign. So we have removed it as a con and increased the score.
Specifications
Make Neon Sign specifications:
- Make Neon Signs are based on the latest technology. Using high-quality LED lights, which brings many benefits compared to old traditional glass neon lights.
- Easy to install (Comes with hanging kit)
- Safe to use (Only 12V)
- Energy Efficient
- Durable and long-lasting
- Lightweight
- High quality
- Brighter than other neon tubes
- Fast delivery time
- Guaranteed best prices
- Design and make yours at MakeNeonSign.com
What’s In The Box
- Make Neon Sign
- Power supply and cable
- Touch-controlled power module
- Mounting hardware
Design
I have to admit. I was a little skeptical about Make Neon Sign being able to create a sign using our logo. Given that I don’t know the first thing about the technology they use to make them, it was silly of me to assume. The first thing I noticed was just how well packaged and protected the sign was when it showed up from DHL.
It took a bit of effort to unwrap and open the box, and then the sign itself was taped and wrapped in protective bubble wrap. It was a solid packing job all around.
The sign ships with a mounting kit that consists of four mounting posts, four post screws, and four wall screws. The mounting posts and four post screws are all made of high-quality acrylic. This is probably my only gripe with the mounting system, as I think these would have been better made of aluminum.
The rest of the sign is also made of high-quality acrylic, with the bits that hold the LEDs are made of what feels like soft rubber material. I’m not confident about what it is, but it feels sturdy. You can see the thin wires between the letters and logo, which I assume are electrical. Once lit up, those are hardly noticeable.
And speaking of lit up. Make Neon Sign lights up a room with the LEDs in this sign. It is very bright, which isn’t bad, but a dimmer option would have been excellent.
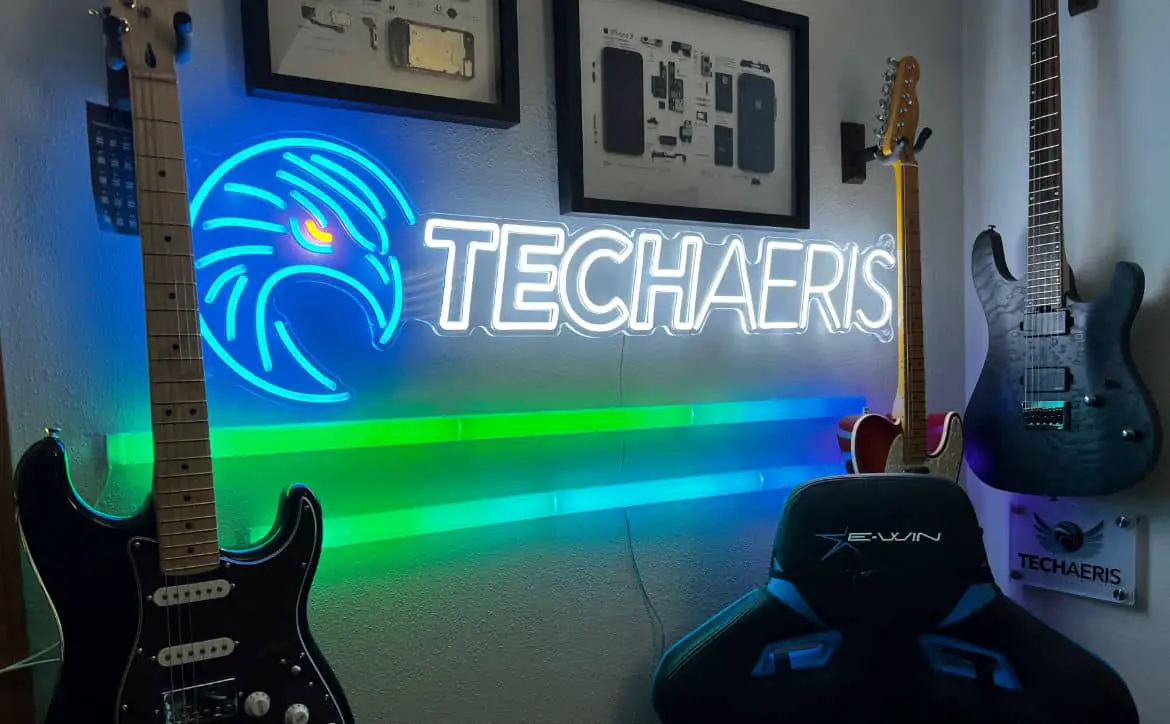
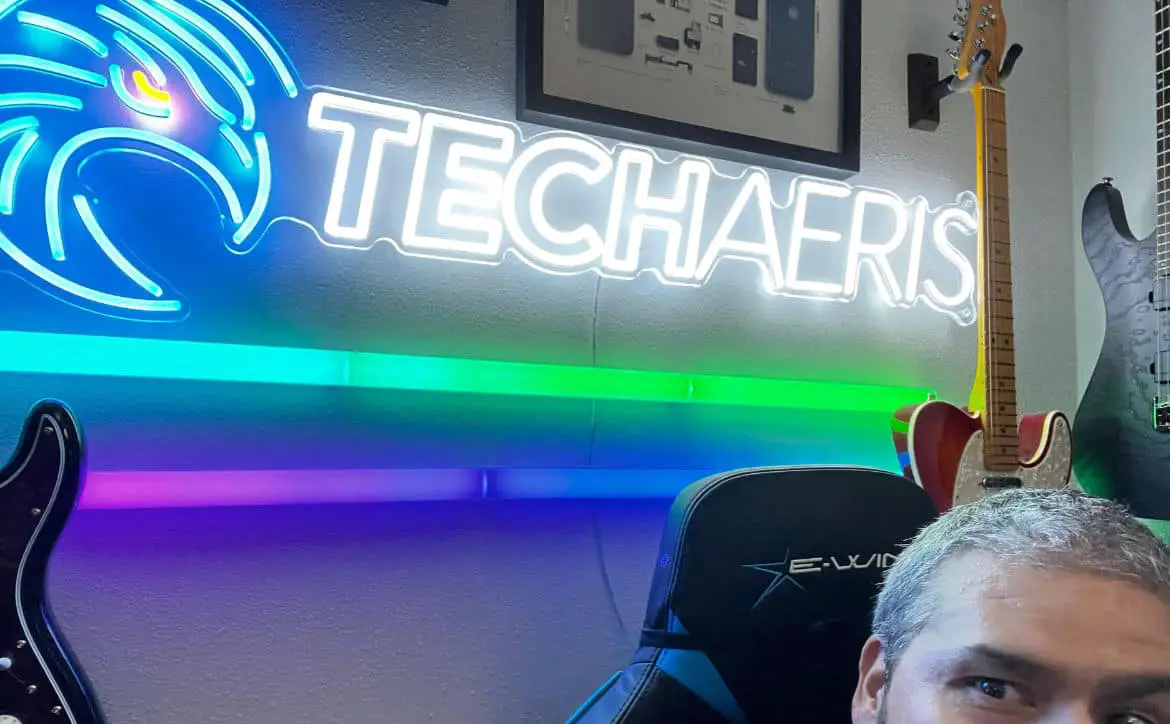
I was very impressed at how accurately they got our logo and font. It is spot on, although the color of the hawk head is slightly off but not a huge deal. We have several colors within the logo as there is a gradient.
Overall, I was thoroughly impressed with just how amazing this sign looks. The quality is also top-notch, and I can see this lasting a long while.
Setup and Install
Setting up the Make Neon Sign is straightforward. There were no instructions, but it’s a pretty basic deal here. I used a level, drill, drill bits, and pencil.
Drywall anchors are not included, but I chose to use them in this case. If you mount the sign on studs, then anchors are not needed. I wanted to be sure the sign wasn’t going anywhere, so I swapped out the included mounting screws for a TOGGLER SnapSkru drywall anchor kit.
The first thing I did was find the space I wanted to install the Make Neon Sign. I measured the distance and found the center. I placed the sign on the wall, leveled it, and marked the level. With someone else holding the sign, I scored the four mounting points with a pencil on the wall.
The TOGGLER anchors are self-drilling, so you don’t have to pre-drill holes, but I do anyway. I have found that these drywall anchors can sometimes break if you don’t pre-drill. Once I had the anchors in, I drilled in the mounting posts. Then, with help, I positioned the Make Neon Sign and screwed the acrylic post screws into the mounting posts through the sign.
I will warn you, be sure to measure a few times and make sure you’re accurate. I was off by just a hair and had issues getting one of the acrylic post screws to go in. I resolved the problem by loosening the other post screws, which allowed for just a hair of play.
Setting up is not hard, but I recommend having a second person to help and measuring twice before installing it.
Price/Value
Pricing varies on the Make Neon Sign offerings. You’ll need to browse their website to see what you might pay. You can get basic signs that are less costly, or you can go custom, like ours, but expect to pay a bit more. As for value, I think a sign like this would greatly benefit a business or content creator. It’s a great way to showcase your brand or business. For personal use, I think it’s up to you whether you want to spend the money to decorate a space in your home. It’s genuinely a fantastic piece and one that is a conversation starter. For reference, this particular sign cost US$450 and came with free shipping via DHL.
Video
Wrap Up
The Make Neon Sign is a fantastic addition to any business, home office, content creator space, or even personal recreational home space. It can get costly, but you can chalk it up to an advertising expense for your company.

